Swagger is a simple yet powerful representation of your RESTful API. Once integrated with WEB API, it becomes easy to test the API without using any third-party tool. In this post, we will see how to add Swagger to ASP.NET Core Web API.
Add Swagger to ASP.NET Core Web API
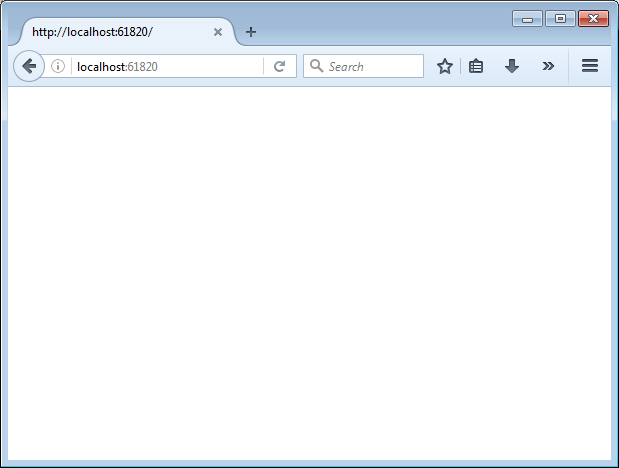
Let’s create an ASP.NET Core Web API project. The default Web API template comes with a controller named “Values” with some GET, POST, PUT and DELETE method. Once the WEB API project is created, just run the app. You will see the following. There is no UI. There isn’t a list of all API methods and any other detail about them.

Here, Swagger can be great help. To configure Swagger, we need to add the required nuget package for it. So open project.json and add the following line under dependencies section and save it. Visual studio will restore the package.
dependencies": {
    "Microsoft.NETCore.App": {
      "version": "1.0.0",
      "type": "platform"
    },
    "Swashbuckle": "6.0.0-beta901"
  },
Now open Startup.cs file to add swagger service to middleware.
public void ConfigureServices(IServiceCollection services)
{
    // Add framework services.
    services.AddApplicationInsightsTelemetry(Configuration);
    services.AddMvc();
    services.AddSwaggerGen();
}
And also add the highlighted lines code in Configure method.
public void Configure(IApplicationBuilder app, IHostingEnvironment env, ILoggerFactory loggerFactory)
{
    loggerFactory.AddConsole(Configuration.GetSection("Logging"));
    loggerFactory.AddDebug();

    app.UseApplicationInsightsRequestTelemetry();
    app.UseApplicationInsightsExceptionTelemetry();

    app.UseMvc();
    app.UseSwagger();
    app.UseSwaggerUi();
}
Now run the app and guess what still no swagger UI . Well to see swagger UI, append /swagger/ui to the Web API URL. For example, if you are running on localhost, then URL should be,
http://localhost:61820/swagger/ui/
Set Swagger URL as launch URL
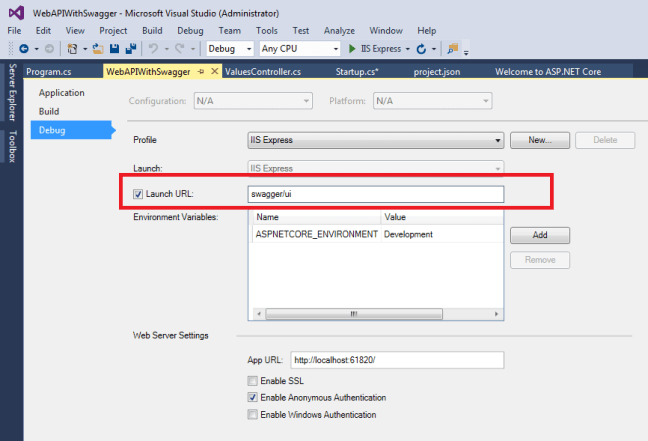
But every time, appending /swagger/ui to URL is pain. This can be fixed and swagger URL can be set as application’s launch URL. To set it, right-click on Project -> select properties -> navigate to debug tab. On debug tab, change Launch URL value to “swagger/ui”.
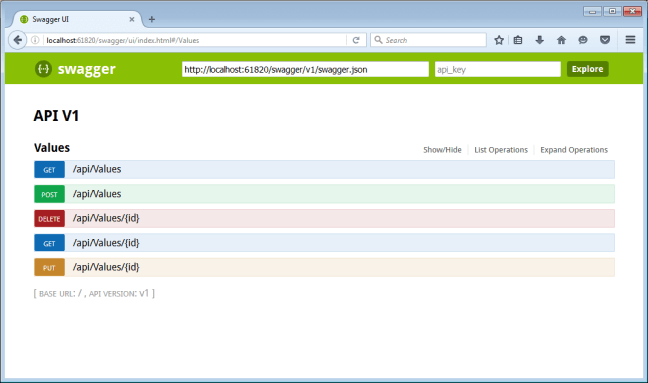
When you run the app with Swagger URL, you should see following.

Here you can see Values controller with all the API methods along with HTTP verb settings. And different colors are used for different verbs to easily identify actions. Clicking on any method will give you details about accepted parameters, return type and allows you to test the method.
We achieved this with minimal configuration and without any customization. Swagger can be customized to include your own API description, show method’s XML comments, show enum values as string and many more. Let’s do some customization.
Add API Description
To add your own description, add the following highlight code to ConfigureServices method of Startup.cs. You can add version number, title, description, author details and any terms to use the API.
public void ConfigureServices(IServiceCollection services)
{
    // Add framework services.
    services.AddApplicationInsightsTelemetry(Configuration);
    services.AddMvc();
    services.AddSwaggerGen();
    services.ConfigureSwaggerGen(options =>
    {
        options.SingleApiVersion(new Info
        {
            Version = "v1",
            Title = "My API",
            Description = "My First ASP.NET Core Web API",
            TermsOfService = "None",
            Contact = new Contact() { Name = "Talking Dotnet", Email = "contact@talkingdotnet.com", Url = "www.talkingdotnet.com" }
        });
    });
}
Run the app and you should see the description on top as highlighted in below image.
Add action’s XML Comments
By default, swagger does not use XML comments which we put on top of actions. But there is an option to display them with Swagger UI. First, we need to enable a setting in our project so that when the project is built, all the XML comments get saved in a XML file and then swagger can use it to display the comments.
To enable it, right-click on project -> select properties option then on Build tab. And on build tab check “XML documentation file” option.

By enabling this option, all xml comments of your project are saved in a XML file with the name [your assembly].xml. And this file is saved in bin\[Debug/Release]\newcoreapp1.0 folder. We need to supply location of this file to Swashbuckle’s IncludeXMLComments method.
Add a method in Startup.cs to get the path of generated XML. This code to get XML path will work in your local environment as well as in production environment.
private string GetXmlCommentsPath()
{
    var app = PlatformServices.Default.Application;
    return System.IO.Path.Combine(app.ApplicationBasePath, "WebAPIWithSwagger.xml");
}
And now add code to include XML comments in ConfigureService method.
public void ConfigureServices(IServiceCollection services)
{
    // Add framework services.
    services.AddApplicationInsightsTelemetry(Configuration);
    var xmlPath = GetXmlCommentsPath();
    services.AddMvc();
    services.AddSwaggerGen();
    services.ConfigureSwaggerGen(options =>
    {
        options.SingleApiVersion(new Info
        {
            Version = "v1",
            Title = "My API",
            Description = "My First ASP.NET Core Web API",
            TermsOfService = "None",
            Contact = new Contact() { Name = "Talking Dotnet", Email = "contact@talkingdotnet.com", Url = "www.talkingdotnet.com" }
        });
        options.IncludeXmlComments(xmlPath);
    });
}
Now let’s add some XML comments to our actions. I added XML comments to all the actions. Here is XML comment written for Delete method.
// DELETE api/values/5
/// <summary>
/// Delete API Value
/// </summary>
/// <remarks>This API will delete the values.</remarks>
/// <param name="id"></param>
[HttpDelete("{id}")]
public void Delete(int id)
{
}
Now run the app, you should see XML comments.
It’s good to see that XML comments converted into beautiful documentation. Isn’t it?
Showing Enum values as string
Another customization, we can make it to display enum values as strings. By default, it will be displayed as numbers. Let’s add an enum and modify Get method to accept enum type parameter.
public enum eValueType
{
    Number,
    Text
}
And updated Get method is,
// GET api/values/5
/// <summary>
/// Get API values by ID
/// </summary>
/// <param name="id"></param>
/// <param name="type">Type of Value</param>
/// <returns></returns>
[HttpGet("{id}")]
public string Get(int id, eValueType type)
{
	return "value";
}
Run the app and see the swagger UI for this method. The enum values are displayed in the dropdown as numbers. Based on number, it’s difficult to identify the string value for enum.

Swashbuckles has method DescribeAllEnumsAsStrings() which needs to be added to code to display enum values as string.
services.ConfigureSwaggerGen(options =>
{
    options.SingleApiVersion(new Info
    {
        Version = "v1",
        Title = "My API",
        Description = "My First Core Web API",
        TermsOfService = "None",
        Contact = new Contact() { Name = "Talking Dotnet", Email = "contact@talkingdotnet.com", Url = "www.talkingdotnet.com" }
    });
    options.IncludeXmlComments(xmlPath);
    options.DescribeAllEnumsAsStrings();
});
And now run the app. You should see actual enum string values in drop down instead of numbers. Quite useful.
There is also a method named DescribeStringEnumsInCamelCase to covert enum string values in camel case.
Summary
Swagger is really useful. It provides an UI to your WEB API which helps in testing the API’s easily. And integrating this with ASP.NET Core WEB API is also quite simple and straightforward.
Thank you for reading. Keep visiting this blog and share this in your network. Please put your thoughts and feedback in the comments section.


Thank you so much for this informative article.